 These gorgeous checked tailored shorts from Red Herring are perfect for winter, being able to pair them with black or brown makes them a perfect item to dress down for the day or up for the night!
Saturday, 7 December 2013
What I Wore • Checked Tailored Shorts
These gorgeous checked tailored shorts from Red Herring are perfect for winter, being able to pair them with black or brown makes them a perfect item to dress down for the day or up for the night! Thursday, 5 December 2013

Sunday, 1 December 2013

Thursday, 28 November 2013

Monday, 25 November 2013

Tuesday, 19 November 2013
 On holiday last month in Spain I went on a desperate hunt for some tweezers (there's always something I forget to pack) and while out searching I came across a gloriously beautiful stand just calling my name!
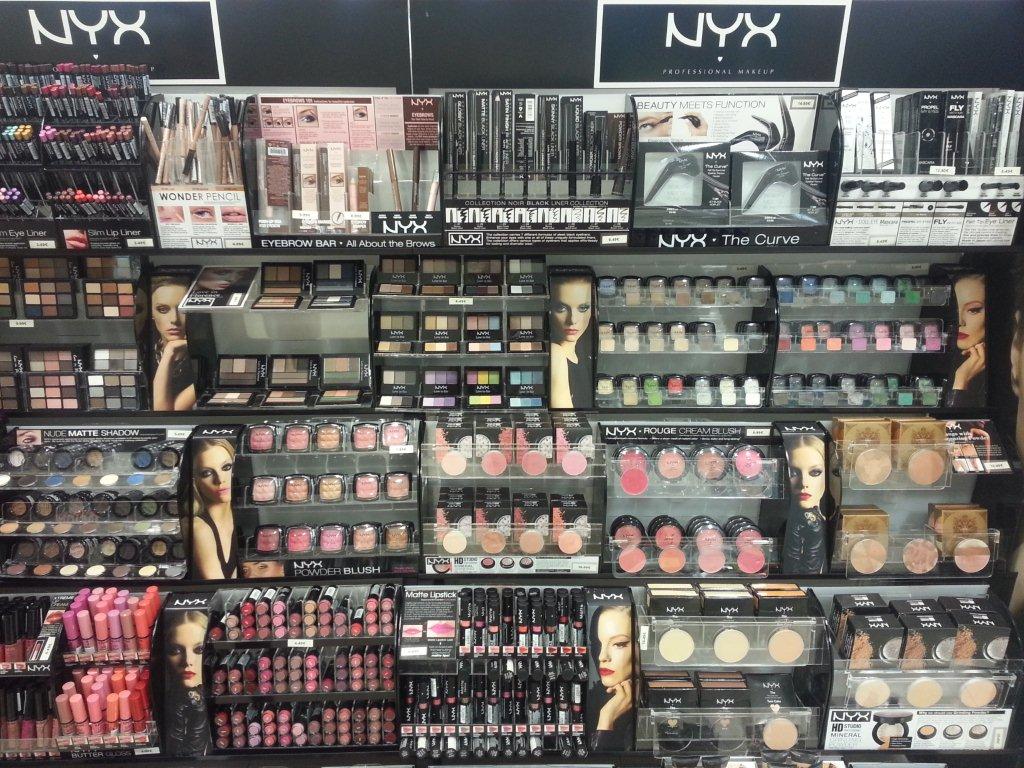
Sunday, 17 November 2013
NOTW • Movember Madness

Hey I moustache you a question... But I'll shave it for later.
Movember is upon us and I've created a moustache nail art worthy of supporting the cause, after all we can't all grow our own moustaches!
Wednesday, 13 November 2013
What I Wore • Vintage Russell and Bromley Bag

I just can't resist popping into charity shops, always keeping my eyes open for those hidden gems, and this time it definitely paid off!
Sunday, 10 November 2013
NOTW • Remembrance Sunday

Today is Remembrance Sunday and as well as buying a poppy I thought I would also do a quick and easy poppy nail art tutorial for you all!
Tuesday, 5 November 2013
What I Wore • The Oversized Coat

I can't explain how long I've been looking for an oversized coat that fits me perfectly. I'd seen so many beautiful coats online but couldn't find the sources, I was sure that I'd never find the right one. It felt like I'd looked through every single shop with absolutely no luck until I found this gorgeous coat.
Monday, 4 November 2013
NOTW • Baby You're A Firework

Sunday, 3 November 2013
Month in Review • October

October has been a great month, much more exciting than I had anticipated at the start of the year! Firstly I am absolutely obsessed with Halloween, so October will always be fantastic in my eyes. Secondly, halfway through the year my parents bought a Spanish apartment, yay! so we quickly booked a break for the half term..
Sunday, 20 October 2013
Black plus Nude equals Gorgeous!

It's always difficult to choose between black - classic, or nude - to elongate the legs, well I have the most gorgeous pair of Dune patent court shoes so that I don't have to!
Monday, 25 March 2013
What I Wore • Necklace & Bracelet Stack


I am absolutely in love with the current stacking trend. I have been on the hunt for necklaces to stack since Christmas and when out shopping Saturday I found some of the perfect ones! The short heart necklace and "luck" necklace were from Accessorize and the middle two necklaces were from the Next Sale, they were exactly what I had been looking for; dainty yet still detailed. I would wear them in the Winter with a simple high necked jumper, so as not to draw any attention away from the necklaces, and in the Spring/Summer with a light floaty shirt like the one from Whistles which I am wearing in the picture. Gold isn't my usual colour however I couldn't resist these beauties as they all looked so gorgeous together!
Sunday, 3 March 2013
Tutorial - Roses
I've made this tutorial using four different base colours to show the variation that you can achieve, depending on the look you're going for. My personal favourite is the dark flowers on the baby blue base.

Antique Rose
This is a photo of my nail art from last weekend, as my work bag is Cath Kidston I had been looking at it quite a bit throughout the week and decided to give it a try...

Please post your own nail designs in the comment box!
Please post your own nail designs in the comment box!
Lego House
For something completely different I thought I would try nails inspired by music, as my other half is slightly Ed Sheeran obsessed he was the first to come to mind.

I used a brush to paint on the '+', then a sponge for the gradient and a dotting tool to paint the paw print.
I was really quite pleased with the outcome of these nails, if you have done any music/song/artist inspired nails please post in the comment box!
This is the paw print and album cover that inspired this look:
Saturday, 2 March 2013
Cute Cupcakes
Sorry I haven't posted in so long! Really haven't been keeping up with this very well, and also a lot of my nails have broken *sad face*
Anyway here's a tutorial I made for cupcake nails:

Firstly I painted the end of the nail pink and used a striping brush to make darker pink stripes.
I then used a dotting tool to paint the white "icing" on the cupcake.
Using the other end of the dotting tool I painted on the sprinkles and cherry on top.
Had I been doing this on all of my nails I would have painted the rest with spots as shown I the picture.
I hope you liked this and if you try it yourself please post a link in the comment box!
Anyway here's a tutorial I made for cupcake nails:
Firstly I painted the end of the nail pink and used a striping brush to make darker pink stripes.
I then used a dotting tool to paint the white "icing" on the cupcake.
Using the other end of the dotting tool I painted on the sprinkles and cherry on top.
Had I been doing this on all of my nails I would have painted the rest with spots as shown I the picture.
I hope you liked this and if you try it yourself please post a link in the comment box!
Tuesday, 22 January 2013
misunderSTUD
This was a design that I had done for the weekend, I've just been so busy and not had time to upload yet!

This is the first time I've used the studs and I stuck them on with craft glue, probably not what it's really for, but it was definitely effective and isn't doing any damage to my nails as its stuck onto the varnish..
Again I'm still practising with the nail art brushes, and I should be getting better in time!
If you need help recreating the leopard print please click here.
Wednesday, 16 January 2013
Out of this World
I started thinking about this nail art at the start of the week when my sister said to me about doing this design onto a pair of her trainers.

As soon as she mentioned it I was straight online looking it up and of course it lead onto nail art!
So here is my first attempt at galaxy nail art, I'm really pleased with it but I think I would like to try it again at some point using perhaps a bright green or pink..
Hope you enjoy!

As soon as she mentioned it I was straight online looking it up and of course it lead onto nail art!
So here is my first attempt at galaxy nail art, I'm really pleased with it but I think I would like to try it again at some point using perhaps a bright green or pink..
Hope you enjoy!
Nail Art Fan is Here!!
Yet again mum has decided to surprise me - aren't I lucky! She has bought me a nail art fan..
First attempt to follow...

First attempt to follow...
Tuesday, 15 January 2013
Ballet Bows
So after my bows turning up in the post I was straight online looking for inspiration of what to do!

I was flicking around on the Internet when I found this idea, however I can't find the link at the moment, I will update this when I find it !!
I used:
- OPI Care to Danse?
- OPI Bubble Bath
- OPI white nail varnish (came in a set of minis so I'm not sure what its called!)
- 6 silver gems
- 2 pink bows
I painted my ring finger on both nails with two coats of the white, then alternated between pink and purple on my other nails.
Once dry I stuck the bow on using craft glue, and finished the ring finger with a polka dot design using the gems.
NB: I used about 5 coats of the pink and purple on each nail so I now know that I definitely need to invest in a darker pink an purple as these are very opaque.
I really wasn't sure how the craft glue would work and if I was going to wake up with one bow missing! But they both stayed put and looked amazing the next morning too!
You could try this design with any other colours and according bows, as I'm sure I will be doing soon!
I Heart Stripes
This is my own take on a design that I saw on 'nannasnails' on Instagram.

I used:
- OPI Big Red Apple
- OPI No Room For The Blues
- An OPI white ( I'm not sure what it's called, it came in a miniature set!)
- REVLON Calla Lily
- FANTASIA Diamonds Top Coat
- A nail art brush
- Striping Tape
I did two coats of the red OPI varnish and the OPI white colour, and three coats of Revlon Calla Lily.
Once dry I used striping tape on the white nail to prepare for the blue lines. When certain it was pressed down fully I used the blue OPI varnish to paint on the stripes - peeling off the tape as soon as I had painted them (whilst still wet), and painted two coats of the Diamonds Top Coat onto the middle finger.
After leaving this to dry, I used my nail art brush dipped in the OPI red to paint on my heart over the stripes.. I'm definitely going to need to get practising with these brushes!!
Sunday, 13 January 2013
Rosy Posy
I drew this design myself when looking for inspiration so I hope you like it..

I used:
- Sally Hensen I pink I can
- OPI Big Apple Red
- OPI DS BOLD
- NYC High Line Green
- Claire's Matte Nail Polish - Blue
- Dotting Tools
- Pink Gems x2
Firstly I painted two coats of Claire's Matte Nail Polish on my thumb, Sally Hensen I Pink I Can on my index, ring and little fingers and OPI Big Apple Red on my middle finger.
To create the roses I used the dotting tool to make round shapes on the thumb with the pink and on the ring finger using the blue.
Whilst this was drying I painted a line of glitter across the tip of my little finger, using OPI DS BOLD, I am going to make a gradient using the glitter.
Once dry I used the small end of the dotting tool dipped in the red to draw curved C shapes from the centre of the flowers. I also painted a thin coat of red glitter over the whole of my little finger, making sure the glitter is thicker at the tip.
I now moved on to the last stage of the flowers, dipping the dotting tool into the green and drawing on small lines as the petals. I also have done a polka dot design on my middle finger using the pink.
For the index finger I use a small drop of clear nail varnish to stick on a pink gem. Once they were all dry I used a inal top coat of OPI Start to Finish to deal the design and finish the look!
I hope this all made sense and don't forget to post any of your own attempts!
Saturday, 12 January 2013
Supplies have arrived!
YAY, mum has decided to surprise me and new supplies have arrived in the post. I'm so excited to get using the bows, keep your eyes peeled!!!

Sunday, 6 January 2013
Leopard Print Luxe
For my first ever nail art I decided to go for a leopard print manicure that I found online here. I thought it was gorgeous so chose to adapt it slightly to suit me.

Things I used:

Firstly I painted my thumb and middle finger with 'OPI from a to z-urich' and my other three fingers with 'OPI don't pretzel my buttons'.

To create to leopard print on the thumb I dipped the dotting tool into 'OPI don't pretzel my buttons' and made different shaped splodges on my nail. Once these had dried I then dipped the smaller end of the dotting tool into the 'RIMMEL black cab' and drew bracket shapes ( ) and C shapes arond the splodges.
On my index finger I stuck a red gem onto my nail using a clear nail varnish. Well you've got to have one simple one!
On my middle finger I dipped the dotting tool back into the 'RIMMEL black cab' and made two rows of dots.
The leopard print on the ring finger uses the same technique as on the thumb, however using the 'OPI from a to z-urich' to create the splodges.
I used the 'OPI from a to z-urich' to paint on the tip then used the black nail art striping brush to create a neat line.
I then repeated this on the other hand and sealed it all in with an OPI top coat.


Thanks for reading and I hope you enjoyed my first ever attempt at nail art!
Things I used:
- OPI FROM A TO Z-URICH
- OPI DON'T PRETZEL MY BUTTONS
- RIMMEL BLACK CAB
- Black Nail Art Striping Brush
- Dotting Tools
- Tweezers
- 2 Red Gems
Firstly I painted my thumb and middle finger with 'OPI from a to z-urich' and my other three fingers with 'OPI don't pretzel my buttons'.
To create to leopard print on the thumb I dipped the dotting tool into 'OPI don't pretzel my buttons' and made different shaped splodges on my nail. Once these had dried I then dipped the smaller end of the dotting tool into the 'RIMMEL black cab' and drew bracket shapes ( ) and C shapes arond the splodges.
On my index finger I stuck a red gem onto my nail using a clear nail varnish. Well you've got to have one simple one!
On my middle finger I dipped the dotting tool back into the 'RIMMEL black cab' and made two rows of dots.
The leopard print on the ring finger uses the same technique as on the thumb, however using the 'OPI from a to z-urich' to create the splodges.
I used the 'OPI from a to z-urich' to paint on the tip then used the black nail art striping brush to create a neat line.
I then repeated this on the other hand and sealed it all in with an OPI top coat.
Thanks for reading and I hope you enjoyed my first ever attempt at nail art!